Abstracting is taking a form and focusing on one part of that form to emphasize it or create a new form out of that aspect of the original subject. For example, observe a burning candle and paint/draw/sculpt only the dripping wax or the flame. That might be a way to abstract the original image of the burning candle. Or: use the spokes of a bicycle wheel to form a composition. These parts of the total may make up their own totality.Abstracts can ALSO be a part of an idea and not a physical subject. For example, think of clouds. The shapes of certain clouds may be your idea; however, you may want to take parts of that concept to create an entirely new form/shape or composition. Emotion can, as well, lead to an abstract photograph.
Abstraction has long been a painting genre. Going back to ancient cave paintings, symbols can be viewed as abstractions of either physical or mental/emotional subject. Some of the cave paintings are representational and others are distorted, probably by intent rather than lack of skill or the erosion over time. I prefer to think that the cave dwellers were as capable and communicative as were any artists in other ages throughout time. Well then, painting and drawing are hands-on practices and abstraction with those mediums can be accomplished with the brush or pencil or pen. What about photography?
In the darkroom, there were/are a variety of ways to abstract an image: double exposure, using bleach or salt, combining chemicals and so forth. Although digital photography poses differences as opposed to film, in the area of abstraction there are limitless ways to abstract a photograph either in the digital camera or in computer post production. In this post, I will suggest some of the post production/computer ways to create abstract photographs.
1. First, chose a subject from your photography/image library in your computer. Or upload an image into your computer.
Your subject may be anything from a panoramic shot of the Grand Canyon to a raindrop. Or as suggested before, it may be an idea or emotion, such as excitement, clouds, a festival, happiness, longing.....anything and everything may be used that appeals to you.
2. Isolate that aspect of your subject on which you would like to focus.
Is your raindrop a specific shape you like? Does it hold a reflection of a garden? Do the striations of rock in the Grand Canyon create a beautiful color palette for your image? Does the feeling of excitement suggest jagged lines or swirls to you? Is a festival like a drip painting or enormous numbers of dark and light dabs?
3. Once your subject is clear to you, think of form, composition, tonality in terms of lights and darks, color or monochrome, design.
4. If your subject is part or all of a physical shape, put it on the appropriate sized "canvas" in your computer's application of choice. I use Photoshop CS3 (still!!). If your subject exists in your mind, select a "canvas" size that you think would be the right proportions on which to conceptualize your idea.
5. Look at/imagine the subject as it will appear on your canvas. And if necessary, re-proportion the canvas. The proportions of an abstract are just as important as those of a representational work.
6. Find your main focal point on the canvas. Would you like the viewer to see the upper right quadrant first? Bottom third? The only choice that is not the best is dead center/ When a canvas has a main focal point in its very middle, the rest of the canvas has a way of "disappearing." Look at the works of some abstractionists and you will see that rarely is dead center the emphasis of the work. For that matter, the same apples to realism. Critical to the work is that when finished, the eye of the viewer "rove" around the photograph to see everything in all parts of the image. That is what creates a good composition.
7. Once you have laid out the composition, examine what Photoshop, Lightroom, Photoshop Elements, or whatever application you are using has to offer in the way of augmenting your subject. I always preserve my original image, copy it in another document, use layers and in this way no elements of my initial photograph are destroyed or unalterably distorted. In Photoshop CS3, I like to experiment with such filters as liquefy, noise, paint daubs, plastic wrap, glowing edges and so on. I begin work with these experimentations until the abstract begins to emerge from my original subject. My premise is that I have an idea in my mind, but the computer will help me by providing the keys to unlock it. Just as when I take a picture with my camera, which is an invaluable tool for capturing a photograph, my computer assists me as any art "equipment" might.
8. If you like, try different plugins. I have an array of plugins available that sync to Photoshop. I use these to experiment with as well. There are many such tool on the Internet that offer a free trial.
9. Crop out what you think doesn't work. Abstracts are ever changing images that, in my opinion, are far more fluid than representational photography usually is. Abstracts represent so many different things to an ever changing audience. Therefore, adapt your composition as you go. In my mind, creating abstract photography is a little like jazz improvisation: notes are added, left out, changed. Altering the proportions of your abstract composition, particularly with the ease of computer cropping, can be a significant part of creating the work.
10. Another option when creating abstract photography is to overlay multiple photographs or parts of photographs on your image. Combining textures, colors, design, and even other subjects may enhance your photograph.
Most of all, I find that through abstracting photographs, I can produce better representational images. Abstraction teaches me the fundamentals: composition, values (tonality), color proportion, line, form. It is also fun and a marvelous way to experiment with the wealth of technology photographers have at their fingertips.
Steps in creating an abstract photograph. After the images, I describe the process.
 |
| Metalic Rose: Abstract Photography |
|
|
|
|
|
|
 |
| Step 1 |
 |
| Step 2 |
|
|
 |
| Step 3 |
|
|
 |
| Step 4 |
 |
| Step 5 |
 |
| Step 6 |
Creating Metalic Rose:
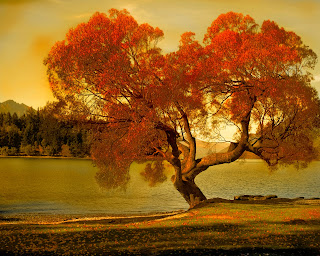
Step 1: Metalic Rose began with a graphic design I created years ago.
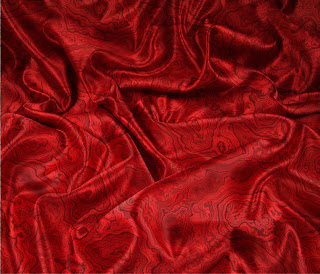
Step 2: I changed the color of the graphic and overlaid an image of crumpled satin to create more textural interest.
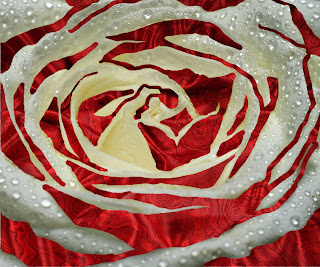
Step 3: On a separate layer, I added a photograph of a rose with dewdrops above the background texture.
Step 4: Using a mask, I painted out sections of the rose where I wanted the texture background to come through.
Step 5: Using a gradient, I added tonal interest by emphasizing the darks and lights.
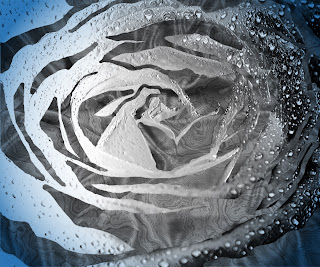
Step 6: By converting the image to black and white, I "popped" the lights and darks, especially the dewdrops in the dark areas of the photograph. I then used several plugins and overlays to develop the "metalic" look I wanted.
Note: Although Metalic Rose is recognizable as a rose, is it? Do you see something other than a rose?


